Aircraft Spruce & Specialty Co.

The Rebirth Of A Cessna 170B Aircraft Story
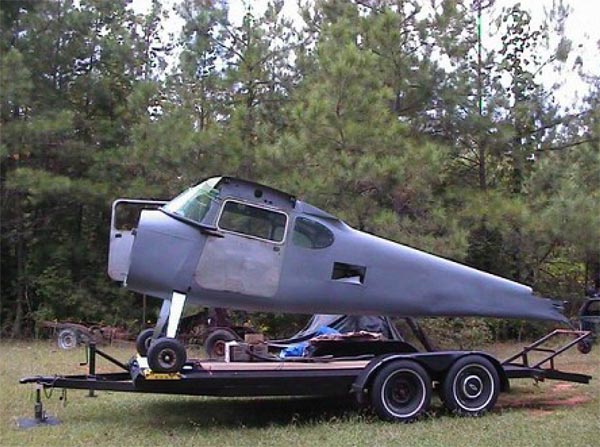
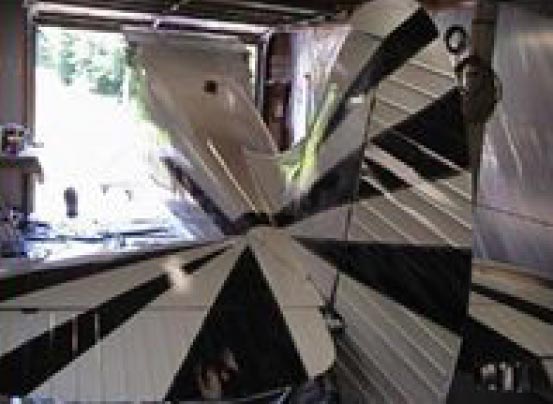
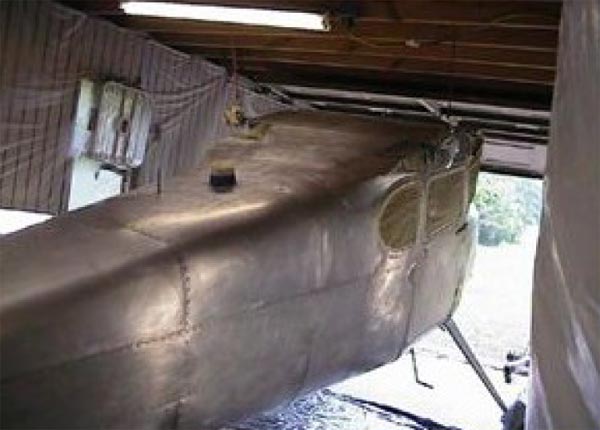
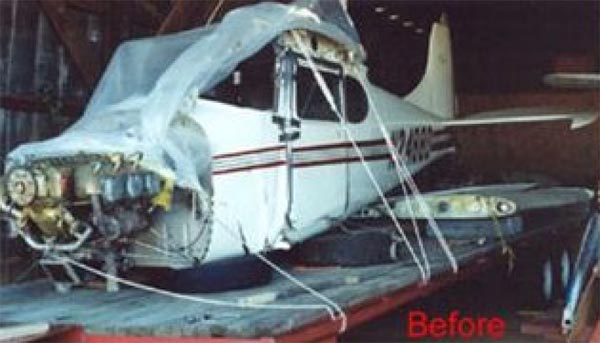
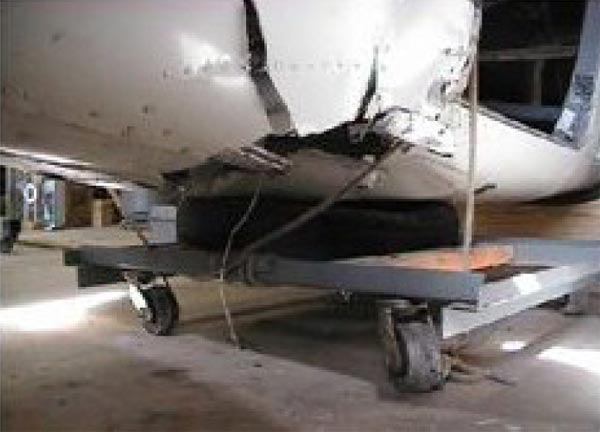
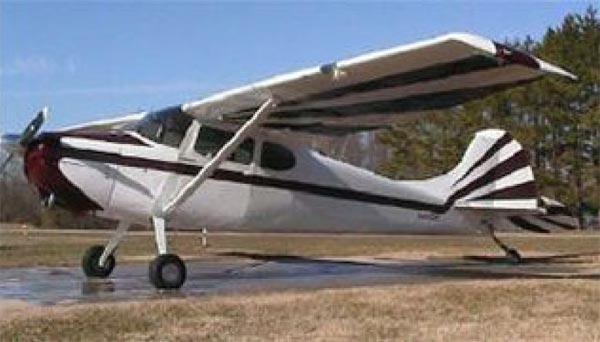
The Rebirth of A Cessna 170B I quit flying about 15 years ago. Sold my Cessna 170B knowing that I would never be able to purchase another aircraft. Well I got the bug again about 3 years ago to fly again. Its my wifes fault; she said that I could get another plane if I wanted it. We live in a society that we dont take responsibility for our own actions. Well I started searching on the internet and finally found N2488D. This was a 52 Cessna 170B that had a lot of damage from a ground loop. Based on the damage results, the owner must have had a right crosswind. Once it started the right hand turn, the aircraft had so much lateral force that the left main axle broke. Im sure thats when all of the excitement began to happen. The left gear leg wrapped underneath the aircraft puncturing the belly skin and narrowly missing the fuel line running to the selector valve. The gearbox was ripped open underneath the pilots feet. The left wing made contact with terra firma. The windshield broke and popped out. Sheet metal was torn. The prop struck pavement. I guess after the dust settled and the smell exited the plane, so did the pilot.
So I purchased this project in Feb. 2002 with no idea of how I could rebuild this aircraft. I didnt have any prior experience. The first thing was to ask friends for opinions. Most recommended that I find a cabin and replace the cabin rather than replacing parts. I also ordered a CD that contained the 170 parts catalog. If you were doing something like this, I would recommend getting a catalog and ask plenty of questions. I reviewed it and began to visualize how this plane could be rebuilt. Had to order a rivet kit with bucking bars, rivet gun and etc. I had used pop rivets before, but this was something else. My wife was Rosie-the-Riveter.
One of the first mistakes was to remove the rivets and try to separate the plane at the bulkhead station 108. Realizing that if I could pull it a part Id never get the two good sections back together. Spent several hours replacing those rivets. After much frustration I decided to take it apart at the rear doorpost. Why didnt I think of that in the first place? Not just one plane, but the donor had to be separated also.
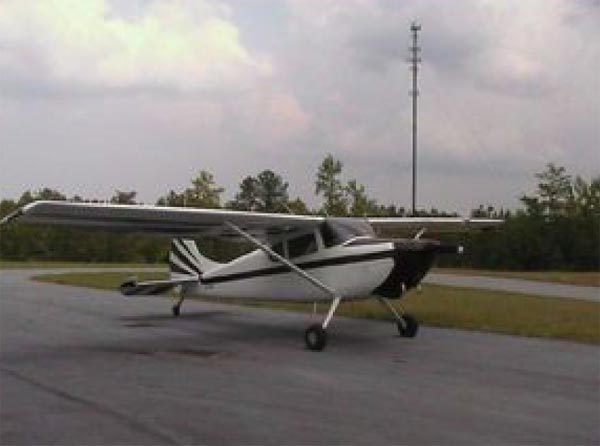
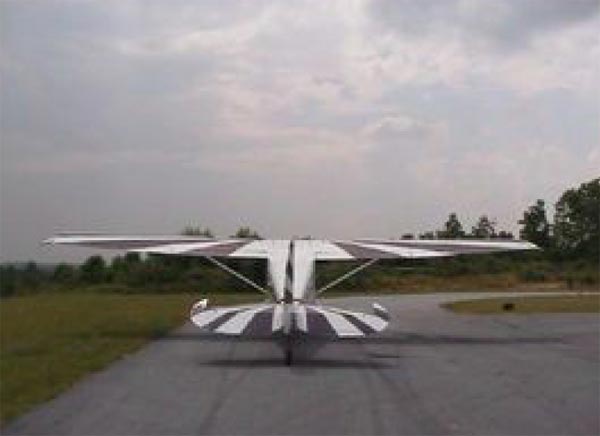
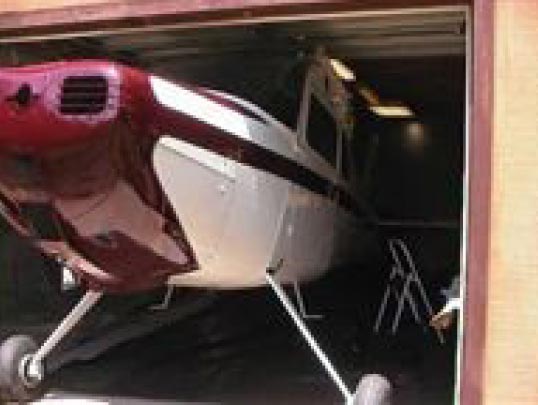
Now this donor plane is another story. In September of 2003 my wife and I traveled from near Greenville, SC to near Peoria, IL and picked up the fuselage and then drove south about 235 mile to pickup the rest of the plane. Must have been a midair crash with the parts scared over two states. Notice that the car-hauling trailer had to be reengineered to accommodate the wider main gear and the longer tail, but it worked. A lot of the donor plane had not been completed. Such as, the missing holes for the band below the windshield. I bought all the paint stripper in South Carolina and stripped ever piece of the plane down to bare metal. Breathed enough fumes to fly without the use of an airplane. Everything was washed down with aledine. Then a good coat of DuPont Metal Bond was applied. Then coats of DuPont urethane primer were applied. The white went on next with the gray creating the pattern just to have the burgundy cover all but a half-inch of gray separator border. About now youre wondering how did this fool get it out of the garage? Had to let air out of the tires and the tail came out at an angle. In March of 2005 I used the modified car-hauling trailer to haul everything to a small airport that my IA was using. We assembled the plane and did a top overhaul on the engine. Then his A&Ps started finding all of those mistakes I had made. You know, like bolts with the heads pointed down. Bolts with not enough thread showing. Turnbuckles with too much thread showing. Remember this is a society that doesnt accept responsibility, so someone else must have done those. But after many final, final, final inspections, we did get everything in compliance.
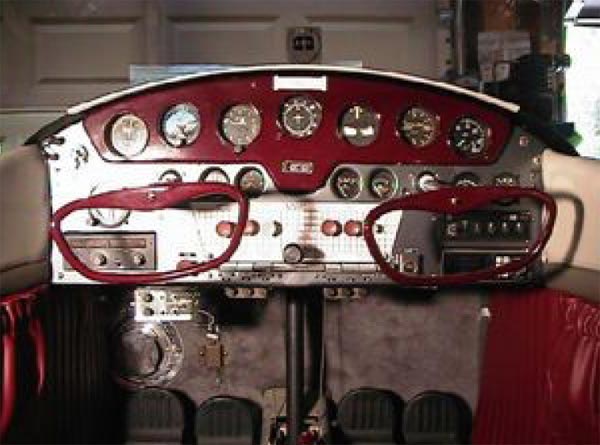
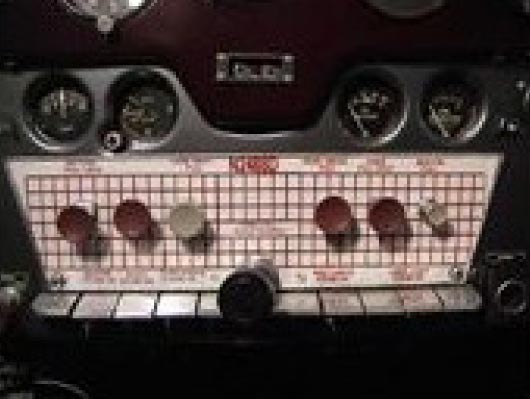
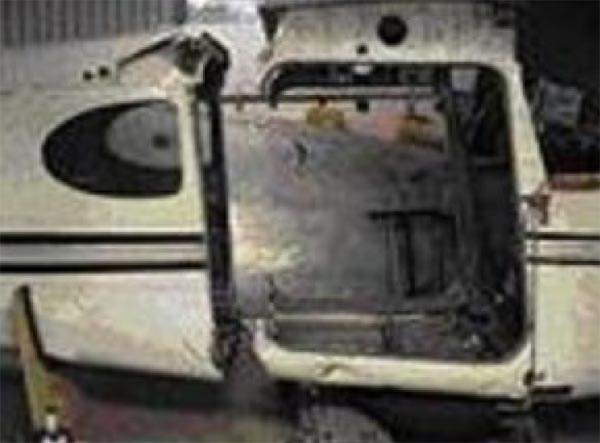
There are many, many side stories that I could share. Have you ever switched out an instrument panel? The donor had a 53 and I wanted to retain the 52s panel. Plus, the control description plastic was worn and I wanted to match the color of the instrument panel with the exterior. Have you ever seen so many wires?
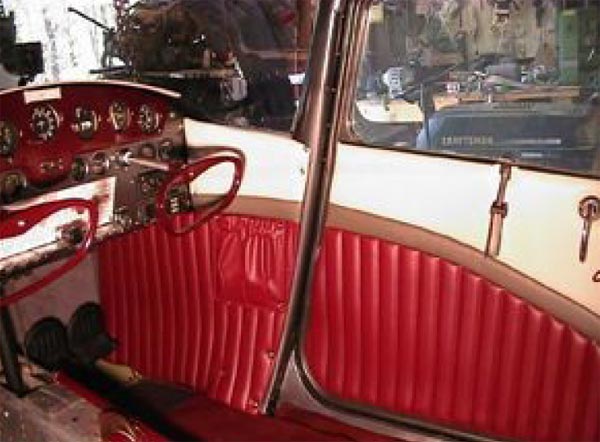
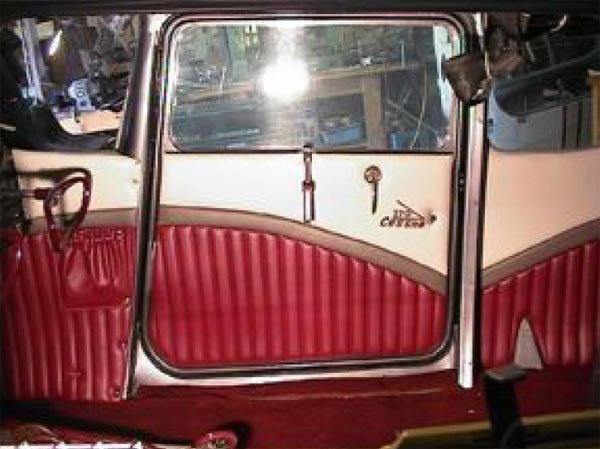
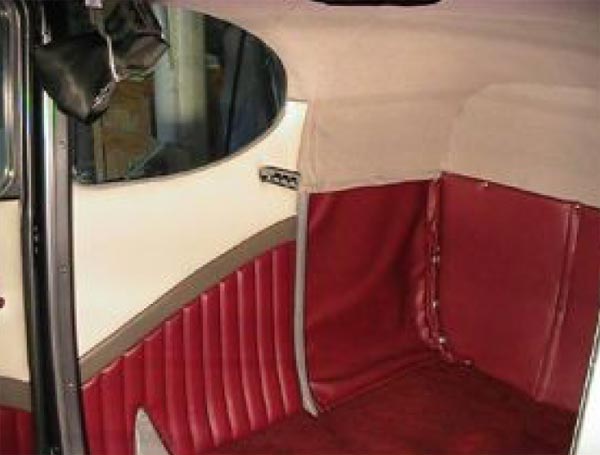
I designed the side panels. The 170 logo was embroidered on the door panels. Heat and soundproofing was added throughout the cabin.
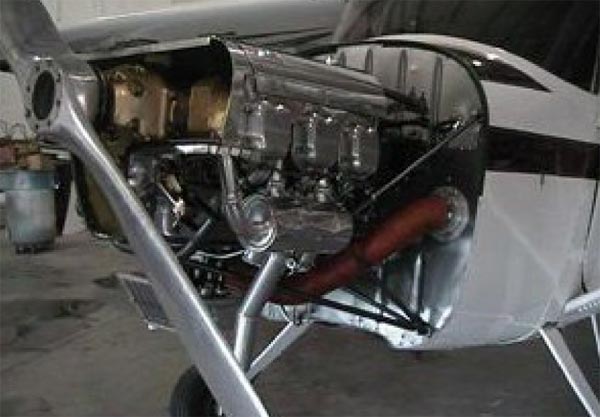
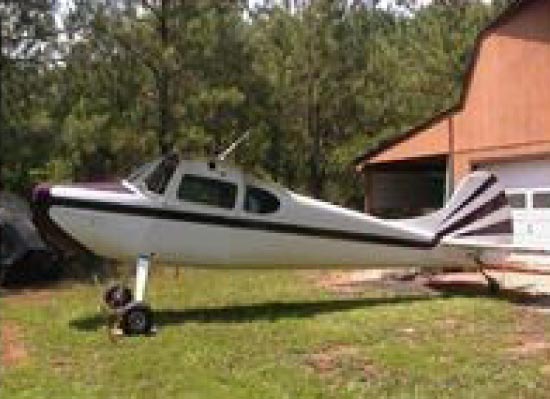
We did a top overhaul on the engine. New Slick magnetos, harness and plugs. New exhaust system. Overhauled McCauley prop. Overhauled carb. Rebuilt accessories. New battery and cables. New scat tubing. Just when you think that there could not be anything left to do, youre reminded that there needs to be a new weight and balance completed and a new Form 337. The job isnt done til the paperwork is done. My CFI and I flew it out of the some assembly required airport on Aug. 13, 2005. This was a great milestone and I would encourage other 170 builders to keep up the faith. Its worth all the effort to keep one of these birds from going to the bone yard.
John W. McGuire |